How to Draw a Fox Easy How to Draw a Bird Easy
Foxes are a very popular animal, and they are beloved by millions of people worldwide.
They have a reputation for being sly and cunning, and because of this along with their distinctive look they are a popular animal to make cartoon characters from.
If you're someone who also loves the fox, you may have wanted to learn how to draw one, and if that's the case then you're in the right place!
We have created this step-by-step guide on how to draw a fox in just 6 easy steps to make drawing a fox easier than ever.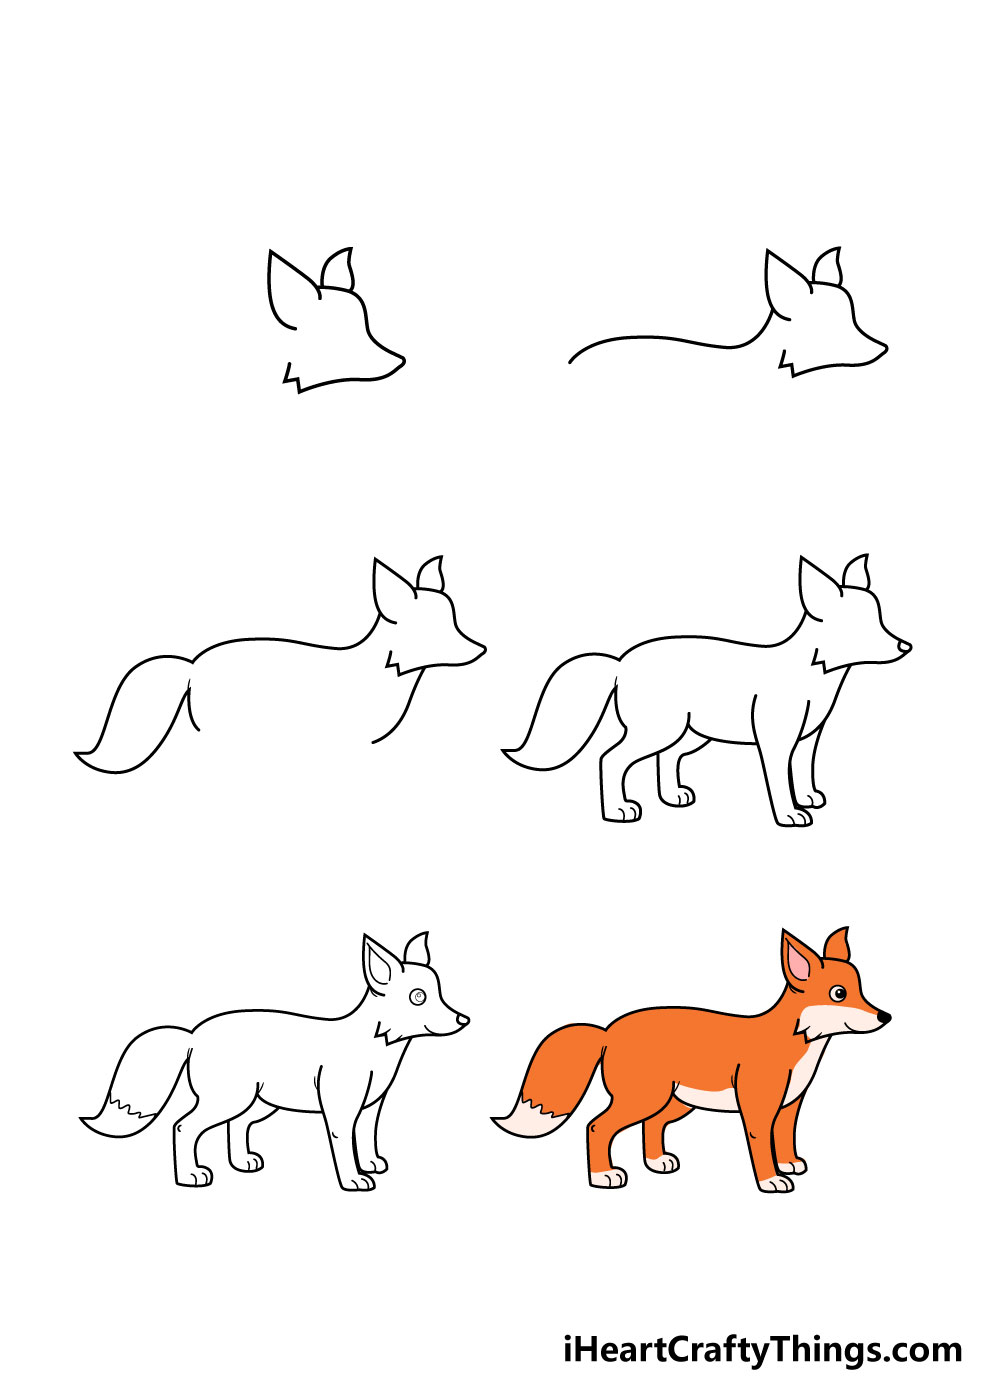
What's in this Blog Post
- How to Draw A Fox – Let's get Started!
- Step 1
- Step 2 – Next, draw in the back of the fox
- Step 3 – Now, draw in the tail and chest
- Step 4 – Next, we will add in the legs and nose
- Step 5 – Now, you can draw in the final details
- Step 6 – Now finish it off with some color
- Do this to take your fox drawing to the next level
- Your Fox Drawing is Complete!
How to Draw A Fox – Let's get Started!
Step 1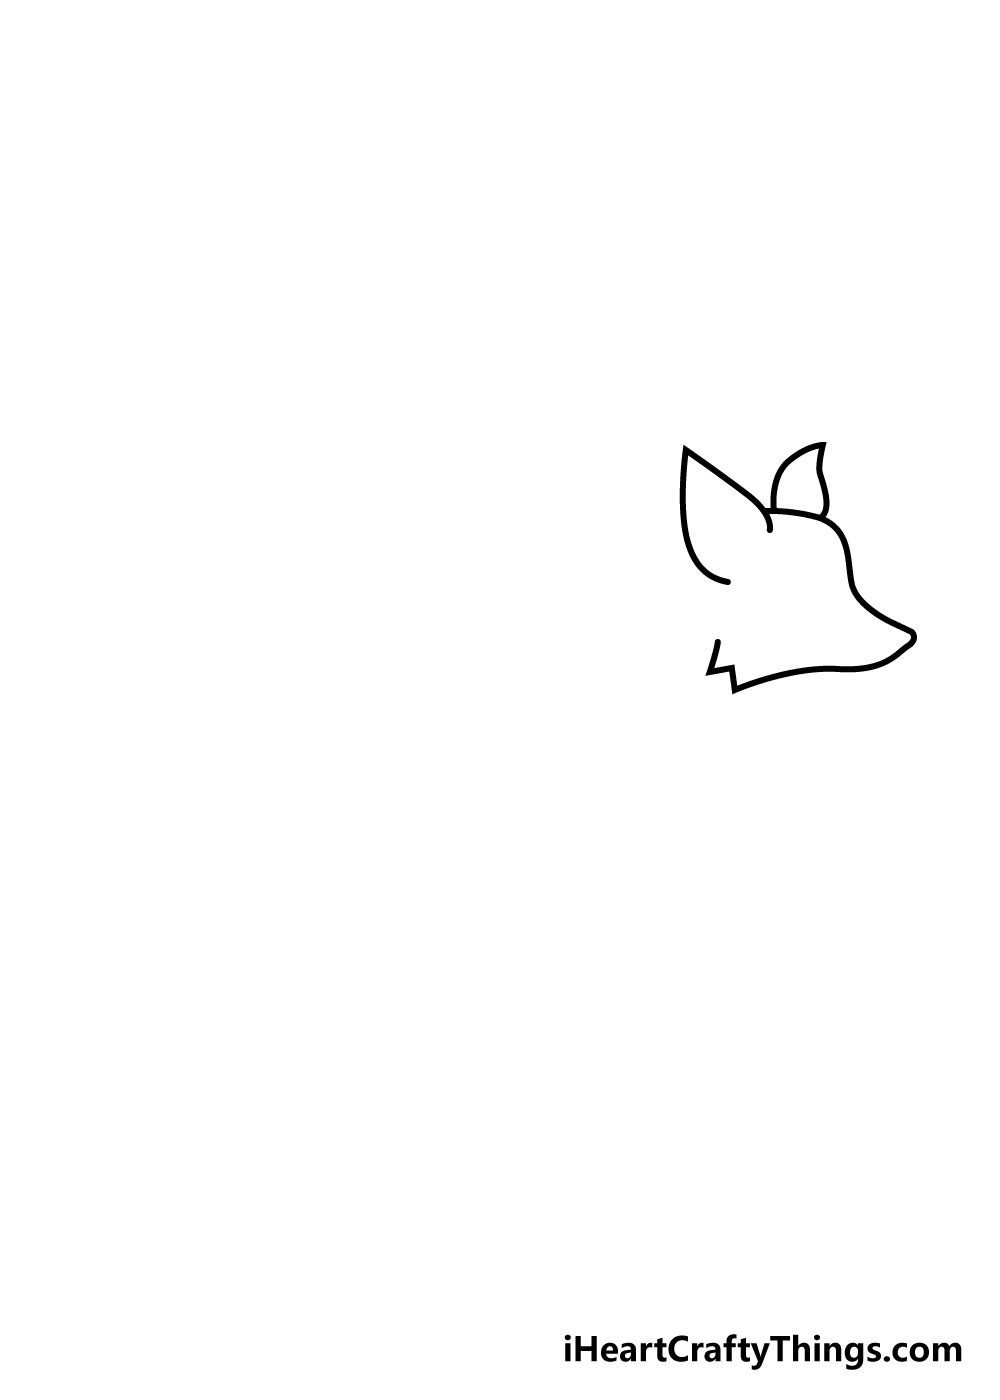
For the first step in this guide on how to draw a fox, we will be starting with the head of your fox. There are a few elements to this step, so we will focus on each part.
To start with, we will draw in the ear that's bigger in the picture. You can draw this with a curved line that is pointy at the middle of it.
Then, you can draw in the face of the fox. Starting from the ear, use a curved line for the forehead and then use sharper lines for the snout.
Finish it off with some sharper lines for the fur behind its head, and then you can draw in the other ear as it appears in the image.
This part could be a bit tricky, so you could try to draw it with a lighter pencil first and then go over it in pen once you're happy with how it looks.
Step 2 – Next, draw in the back of the fox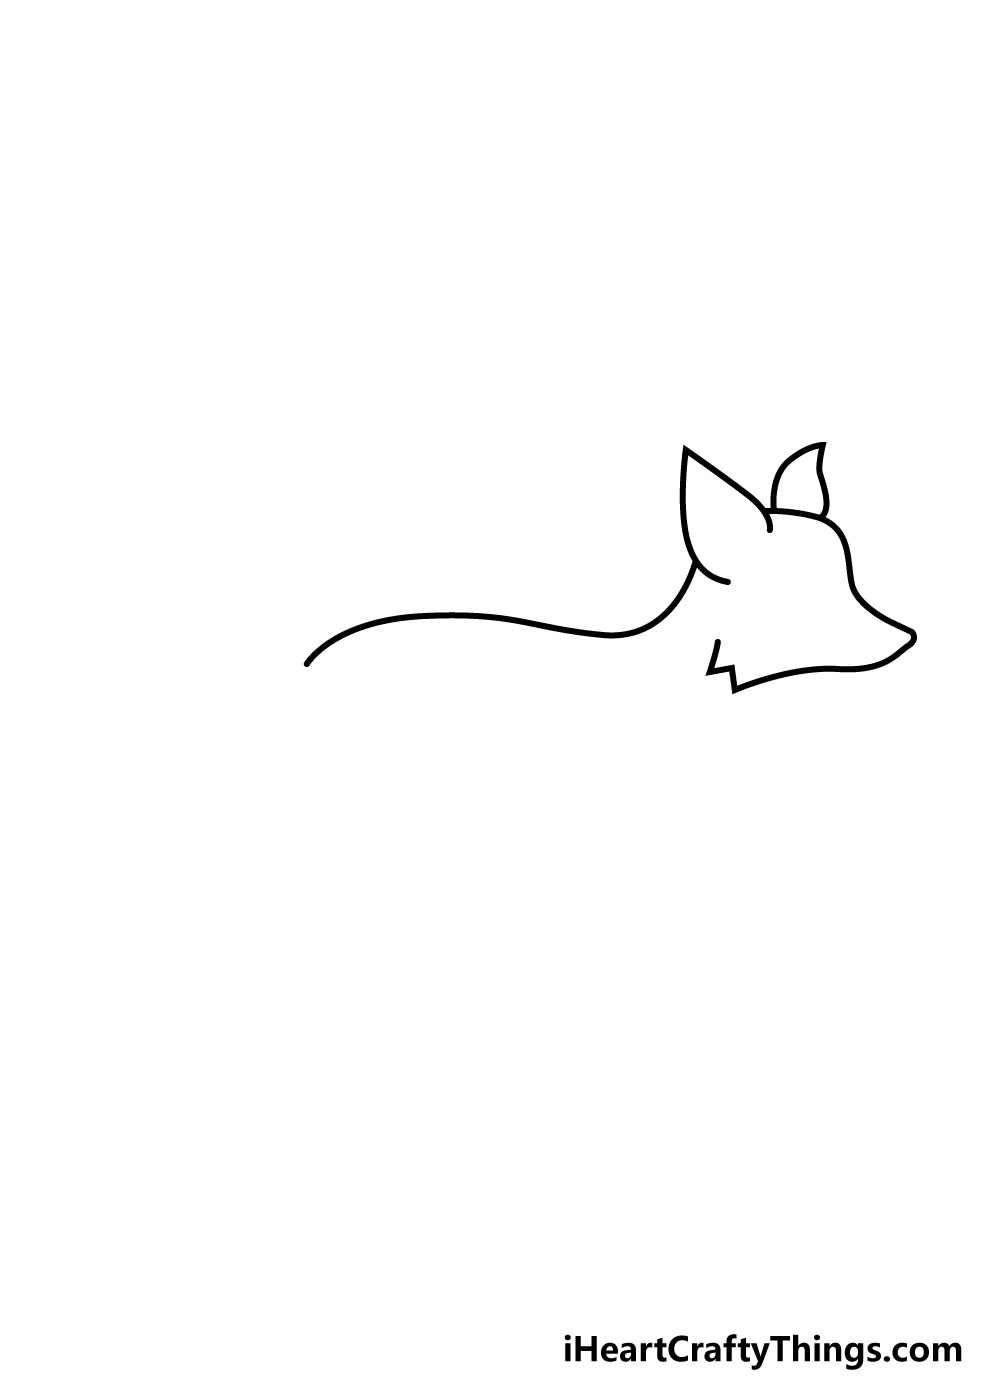
Now that we have the face of your fox drawing drawn, we can add in its back. Drawing back from the head, we will be using a curved line to form the back of your fox.
The reference image will give you a good idea on the angle and length that the back should have.
Step 3 – Now, draw in the tail and chest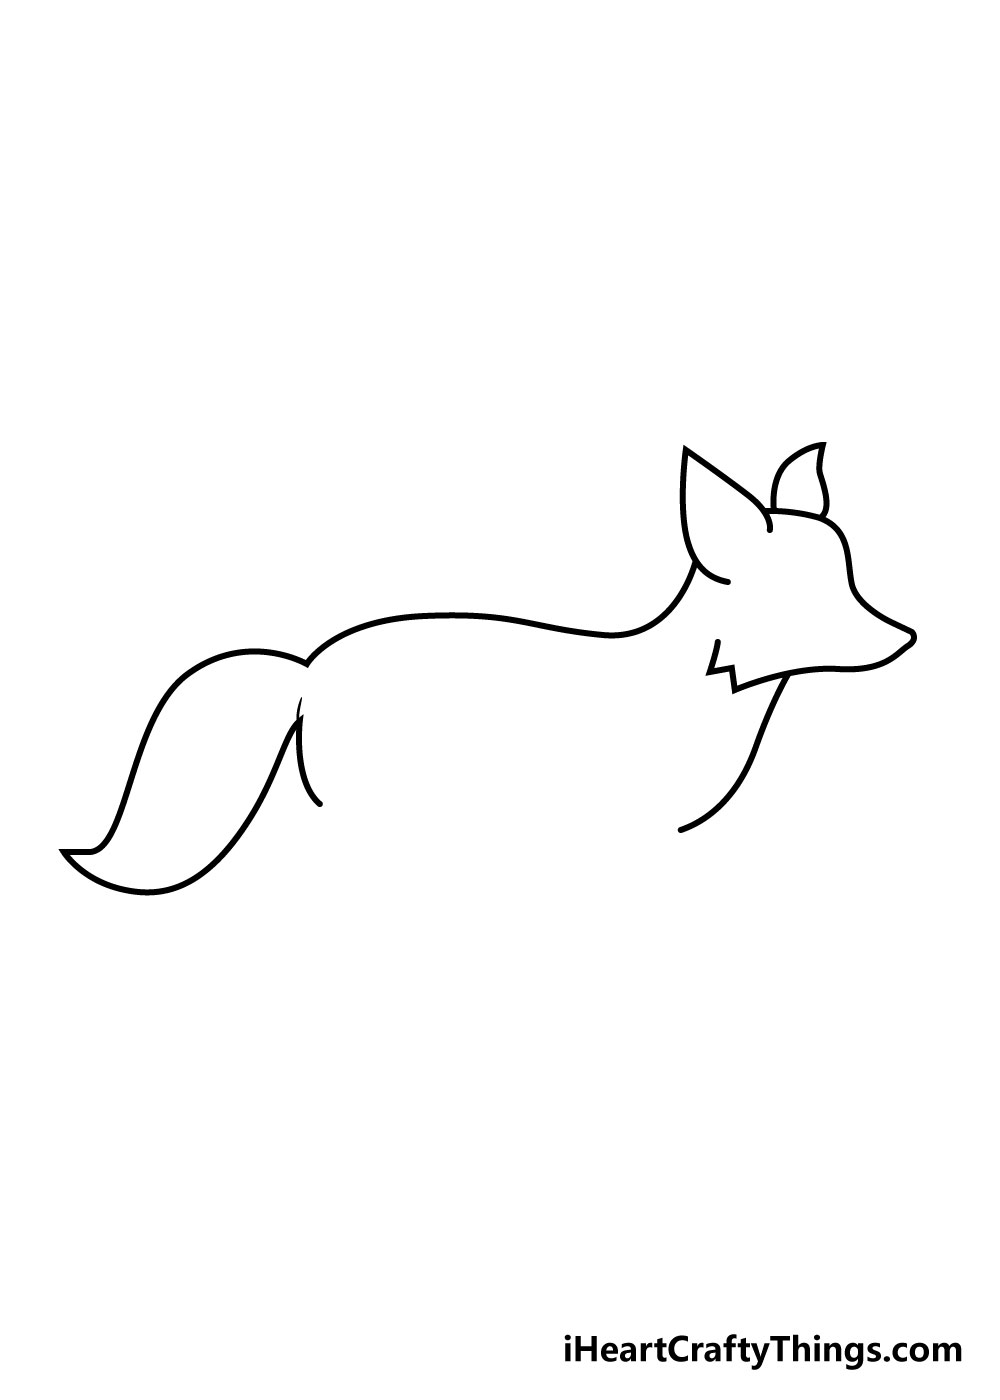
Foxes are known for their luscious, bushy tails, so for this step in our guide on how to draw a fox, we will be drawing one in for your fox drawing.
To draw in the tail, we will be using a very curvy line going out from the line that we used for the back that loops back towards the body.
Now that you have the tail drawn in, you can add another slightly curved line under the head to make the chest of the fox.
Step 4 – Next, we will add in the legs and nose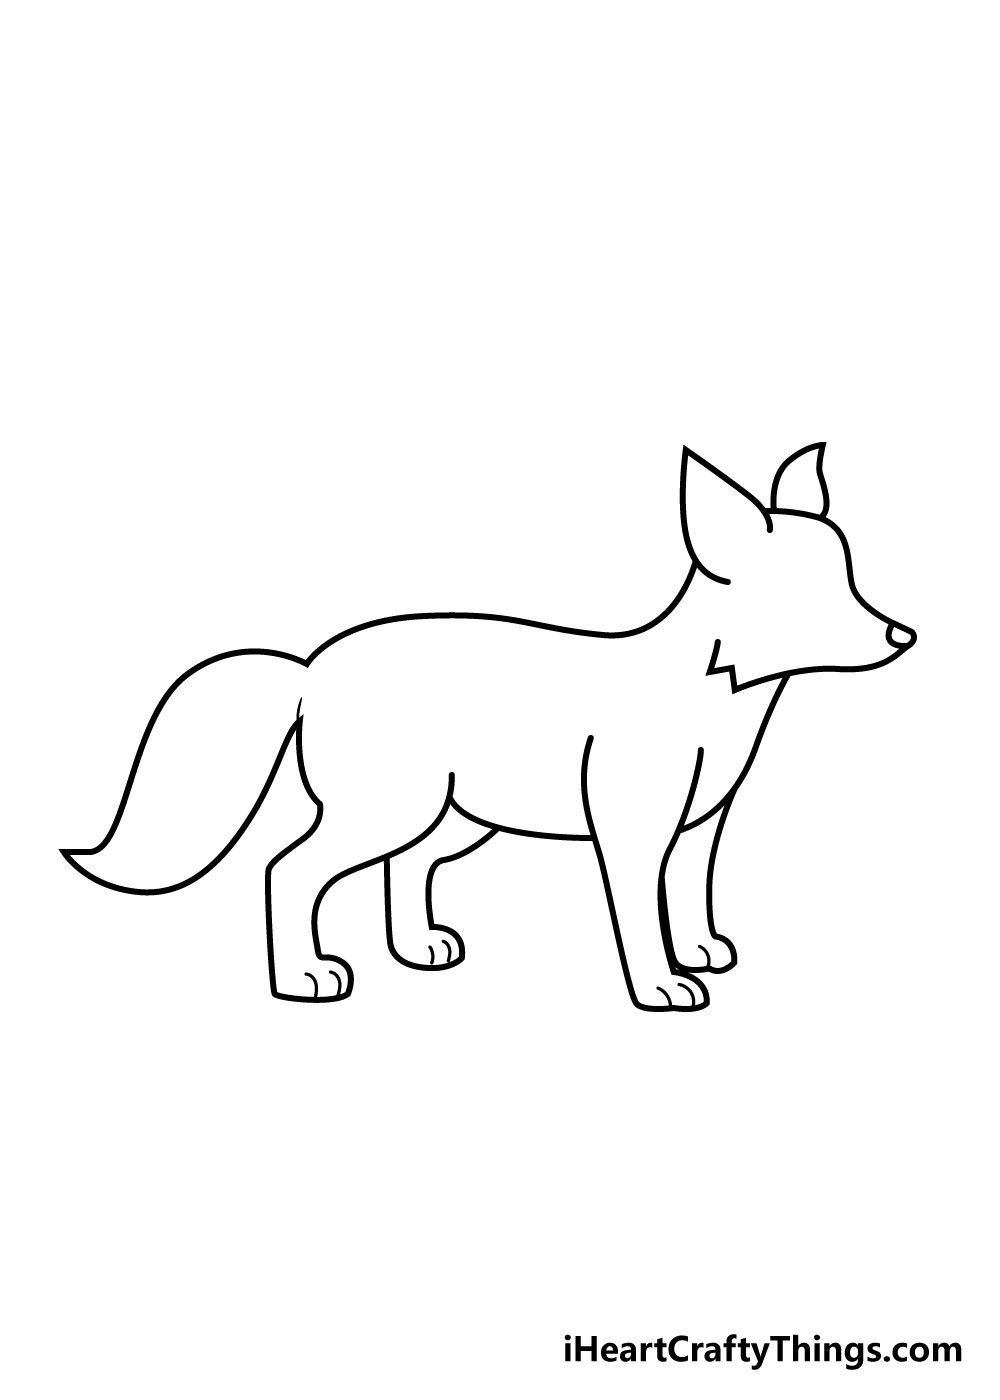
Your fox drawing is beginning to take shape now! For this next step, we will be adding in the four legs of your fox.
This is a step where referring to the reference image closely will be very helpful.
I would recommend drawing in the front legs first, drawing them down from where the chest ends, and then drawing in a stomach going backward.
Once you have the front legs in, you can draw in the thicker back legs. For this step, I also think that using a pencil first would be very helpful to get the look right.
Once all of the legs and stomach are drawn, you can use a small line for the nose of your fox.
Step 5 – Now, you can draw in the final details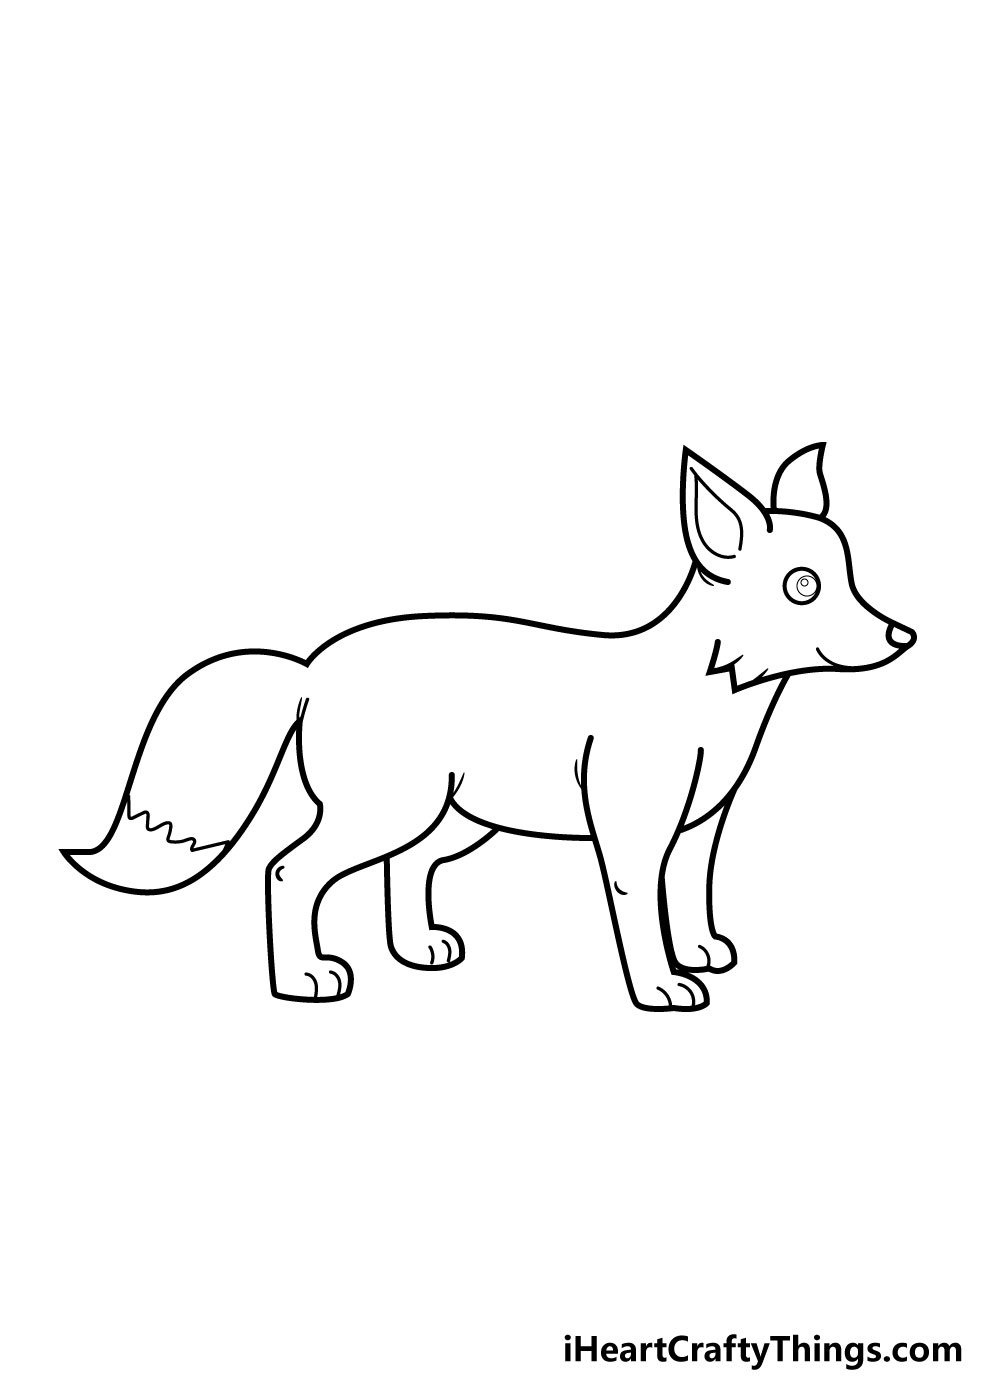
You have almost completed your task of learning how to draw a fox now! It just needs a few more details until you can get started with coloring in your drawing, so we will focus on those details now.
First of all, you can draw in some eyes by drawing in a small circle inside of another one.
This is one way you could draw in the eyes, but you could also use another design like a solid circle if you like that look better.
Then, you can draw in a mouth for your fox. This one has a cute smiley face, but you could also use a different line to give the fox different facial expressions!
Once the face is done, you can add in various lines to give some fury details to your fox drawing.
We've shown some that you could add in with our reference image, but you can add in some of your own lines that look good to you!
With these details, there's only one more step to go!
Step 6 – Now finish it off with some color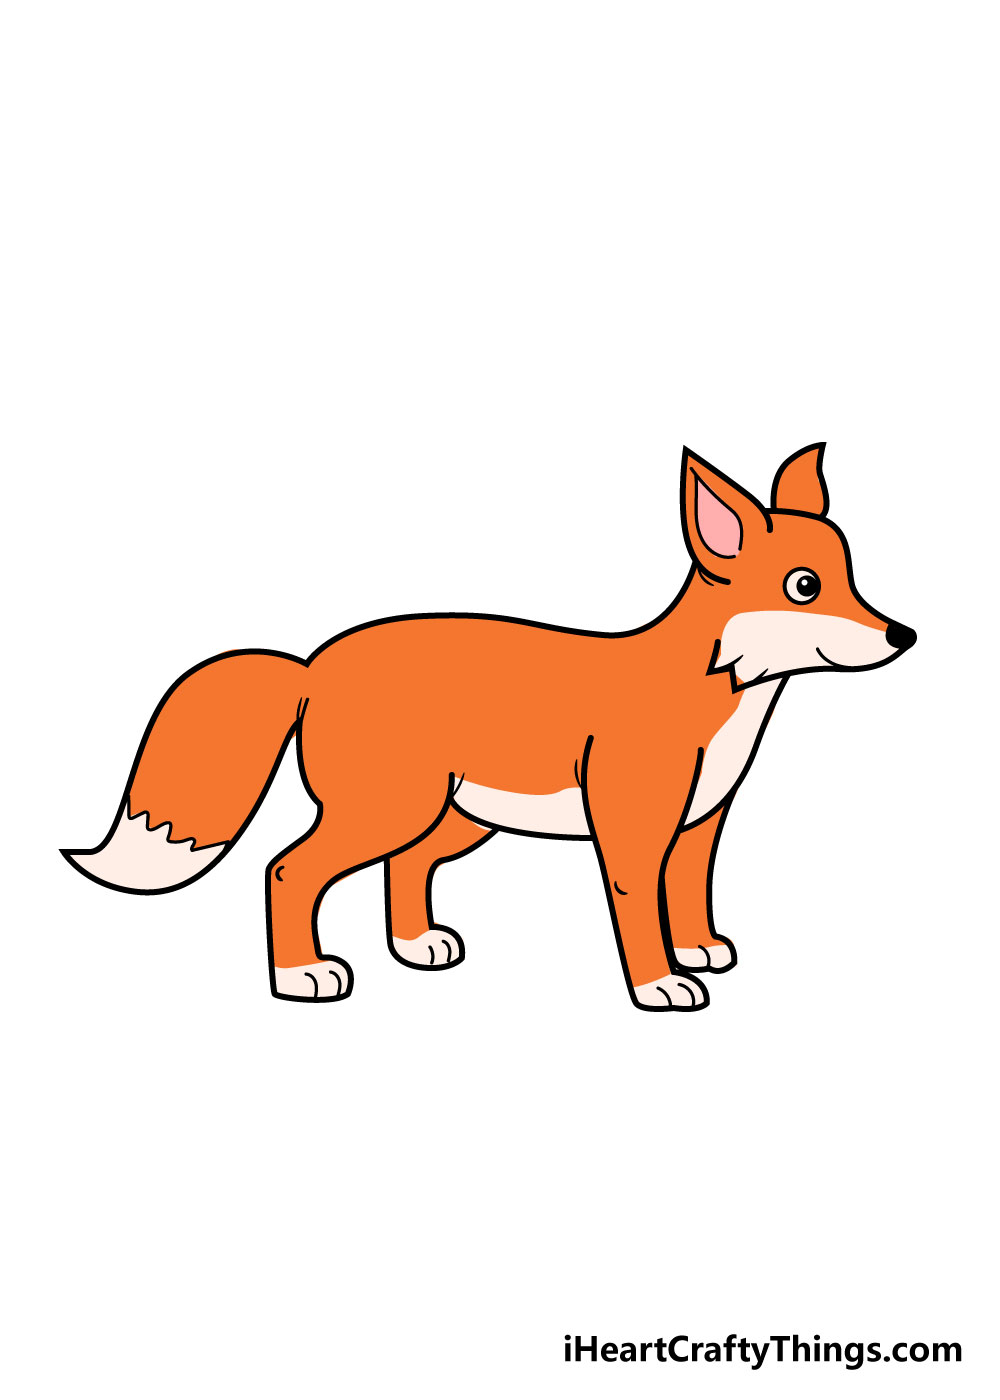
Now that the final details of your fox drawing are drawn in, it's time for one more fun step, and that's coloring in your amazing fox drawing!
Foxes have distinctive and beautiful red and white coloring, so if you go for their normal coloring then this will be a beautifully vibrant picture!
You could also make it more stylistic by using your favorite bright colors, so you should really let your creativity run wild and express yourself!
It can also be fun to incorporate and experiment with different art mediums, such as acrylic paints, watercolors, colored pens and pencils.
The sky is the limit for your creativity, so I can't wait to see what you come up with for your picture!
Do this to take your fox drawing to the next level
Let's take a look at how to improve your fox drawing even more!
The drawing of a fox that we created in this guide is really cute! While it already looks great, we think that it could look even better with a background.
The fox could be in a quiet forest or foraging on a hill for a few ideas. Or, you could use patterns and shapes or even a stylish background setting like a school or a carnival!
There are lots of ways to get creative, so how will you design a background?
Another way that you could make this fox drawing look even better would be to add some more animal friends for it.
Now that you know how to draw a fox, you could add a few more fox friends for it to play with!
Or you could draw other forest creatures such as badgers and squirrels to make the image even cuter. What other little creatures can you think of for this fox scene?
We created a fairly realistically proportioned fox in this guide, but you could change up some details to make it more imaginative.
For some ideas, the fox could be wearing a funny hat or maybe some colorful socks over its paws.
Changing or adding smaller details such as these can make a big difference and really change the dynamic of the scene. Can you think of any more fun little details and changes that you could make?
Finally, let's talk colors! We spoke a bit about some of the colors you could use earlier in the guide, but there is really such a wide array of colors and mediums you can use.
Even if you stick to the typical red and orange of a fox's fur, you can achieve many different shades by playing around with your art tools and mediums.
We think that some colored markers and pens would be perfect for giving this fox some bright and strikingly colored fur, but what else could you use for this fox sketch?
Your Fox Drawing is Complete!
We really hope that this step-by-step guide on how to draw a fox was helpful and fun for you to use!
When using a step-by-step guide such as this one, it can really help to break down a drawing challenge into more manageable steps.
If you follow the steps in this guide and do your best then we are sure you will have an awesome fox drawing in no time at all!
Once you've got the hang of drawing a fox, you can work in your own details to further personalize it.
You could draw in some fun backgrounds, change the position of the head or legs or use different art mediums for some fun new unique scenes!
We will be bringing out lots of great new step by step drawing guides like this one constantly, so be sure to check in to our page frequently to never miss out on the fun!
Once you've drawn and colored in your fox drawing, we also hope that you will share it to our Facebook and Pinterest pages for us to admire.
We can't wait to see your wonderful and creative fox drawings!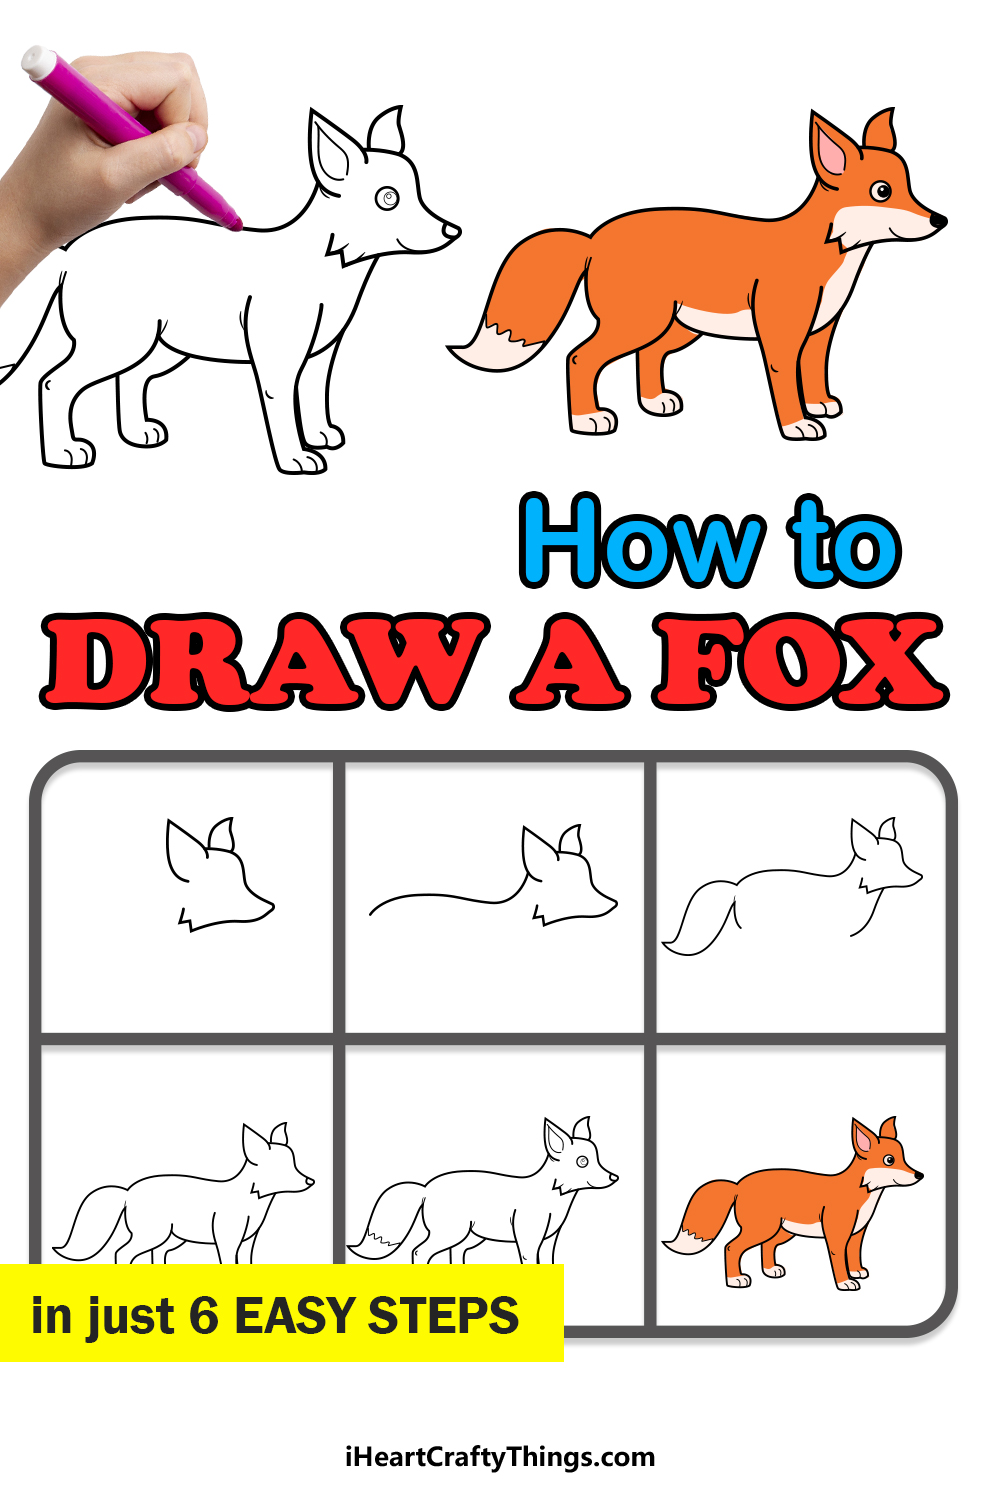
Source: https://iheartcraftythings.com/fox-drawing.html
Post a Comment for "How to Draw a Fox Easy How to Draw a Bird Easy"